Continuous Integration

Continuous integration is a software development practice in which developers regularly integrate their code changes into a source code repository. Automated builds and tests run before or after developers check in their changes. The Metazoa Snapshot Org Management product provides CI tools for Salesforce administrators and developers.

Continuous Integration
With Salesforce and Github

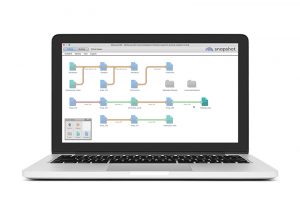
Metazoa Snapshot provides sophisticated and flexible tools for continuously keeping Salesforce accounts, developer projects, and content repositories synchronized. A wide variety of different use cases can be implemented by simply connecting items on the desktop and turning on continuous integration. Developer projects and content repositories can be in either Metadata API or Salesforce DX format.

There are two main styles of continuous integration to choose from. The first is triggered when the source Salesforce Org or developer project changes. In this case selected metadata types are moved from the source to the destination. The second watches for changes in deployment history. When a new deployment makes changes to the source Salesforce Org or developer project, then the same deployment is replayed to the destination.

Your local Salesforce DX or Metadata API project can be optionally connected to a content repository. In this case, the editing tools for the local project are no longer displayed, because the source of the metadata files is now the remote repository. The project folder is still used to store a local copy of the files. Developers can switch the interface back and forth to work on the local project or the content repository as needed. When the project is connected to a content repository the files in the developer project will be replaced when a snapshot is taken.

Continuous Integration with Github and Snapshot

Continuous integration (CI) is crucial for software development as it automates the integration of code changes. This document provides a guide for setting up CI between Salesforce organizations, developer projects, and content repositories using Snapshot.

Configuring Deployment Arrows for Continuous Integration

  1. Select Deployment Arrow: In Snapshot, choose a deployment arrow that you want to use for continuous integration. A deployment arrow represents the connection between a source (e.g., Salesforce org, developer project) and a destination (e.g., Salesforce org, content repository).
  2. Enable Continuous Integration: Right-click on the selected arrow and choose the “Continuous Integration” option.
  3. Select Integration Style: There are two main styles of continuous integration: a. Differential Deployment: This style calculates the differences between the source and the destination. When changes are detected in the source, those changes are deployed to the destination. It ensures the destination mirrors the source. b. Deployment Replay: In this style, when there is a new deployment to the source, that deployment is mimicked and replayed to the destination. This is an intelligent strategy that takes all of the settings and design of the incoming deployment and uses them to create a successful deployment to the destination.
  4. Filter Deployments: You can filter which deployments you want to use for integration by user name or job name.
  5. Configure Deployment Settings: When performing the integration, you can choose to use the source deployment settings that were used for the original deployment, or you can configure custom settings for the integration arrow.
  6. Test Deployment: Before scheduling, you can test the deployment to ensure there are no errors.
  7. Schedule Integration: Once satisfied with the settings, schedule the integration. You can choose a recurring schedule (e.g., every hour) and also set it to rollback all changes if there’s an error during deployment.

Integrating with a Content Repository (e.g., GitHub)

  1. Create a Repository in GitHub: Go to GitHub and create a new repository. Note down the connection string provided by GitHub.
  2. Configure Snapshot with GitHub: Go back to Snapshot and open your developer project. Set up the project as a remote repository. For the pull commands, use the connection string provided by GitHub. Make sure the folder name and project name match the repository you created in GitHub.
  3. Test the Connection: Test the command line to ensure that Snapshot can connect to the GitHub repository.
  4. Initialize the Repository in Snapshot: Take a snapshot with nothing in it to initialize the repository in Snapshot.
  5. Continuous Integration with GitHub: Go to the Continuous Integration section in Snapshot and choose the deployment you want to use. Select the GitHub repository as the destination. Test the deployment to ensure files are created and committed to the repository.
  6. Verify in GitHub: Go back to GitHub to verify that the files have been successfully pushed to the repository.

Conclusion

With Snapshot, you can easily set up continuous integration between Salesforce organizations, developer projects, and content repositories such as GitHub. This ensures that your codebase is consistently up-to-date and helps in maintaining a high standard of code quality.

Learn More!

Snapshot provides powerful tools for Salesforce Administrators that help manage the change and release process, visualize org complexity, improve security and compliance, and lower the total cost of Org ownership. Visit the AppExchange to start a 14 day free trial or click the button below to schedule a demo.

🎉 Congratulations! 🎉

You’ve successfully completed the Metazoa Metadata Studio Certification Class. With the skills you’ve acquired, you’re now adept at harnessing the power of Metazoa’s Metadata Studio, seamlessly integrating artificial intelligence into Salesforce org management. You have earned you a certificate! Well done, and we wish you continued success in your future endeavors!