Unlocked Packages

Salesforce DX projects can be used to create Unlocked Packages in your Dev Hub. These Unlocked Packages and Package Versions can then be installed in any Scratch Org, Salesforce Sandbox, or Developer Edition Org. Unlocked Packages are the key technology for organizing your unpackaged Metadata and reducing the complexity of your Org.

Create Unlocked Packages
with Salesforce DX Projects

Most Salesforce Orgs contain a sea of unpackaged metadata. Some customizations are made by hand with the Setup Menu, others are created with Change Sets or the Metadata API. Unpackaged customizations can pile up over time and make the org difficult to manage. Too many customizations can result in slow performance, reduced agility, sluggish adoption, and added complexity. Moving assets into Unlocked Packages can solve this problem and add much needed structure to your Salesforce account.

There are significant benefits to adopting Salesforce DX and Unlocked Packages. Bugs and problems are isolated to the package instead of being spread across the entire org. When a project needs to be upgraded or replaced, the package makes entangled assets easier to identify. Packages are the foundation for agile development, enabling smaller groups of developers to focus on more isolated sections of code. Packages can be individually tested in a Scratch Org or developer account. Modular packages can be used to enable multiple orgs and partners. Packages lower cost, increase flexibility, reduce complexity, and improve time to production.

Metazoa Snapshot has powerful tools to convert a Salesforce DX project into an Unlocked Package that will be stored in the Dev Hub. Then an administrator can install these Packages and Package Version into any Salesforce Org. When you have built Salesforce DX projects that are working correctly, you can create packages in your Dev Hub and then install the packages into Sandboxes for testing or Production for deployment. The Metadata API can be used to deploy other unpackaged assets. You can also use the Metadata API to move Second-Generation Unlocked Packages into Production. This has the advantage of automatic roll-back if there is an error.

Creating Unlocked Packages with Snapshot

This document explains how to create and install unlocked packages using Metazoa Snapshot, which is a tool used to manage Salesforce deployment pipelines.

Prerequisites

  • A Salesforce Deployment Pipeline.
  • Developer project in Salesforce DX format.
  • A remote repository for the project.
  • Metazoa Snapshot setup.

Steps to Create and Install an Unlocked Package

Step 1: Validate Developer Project

  1. Open Metazoa Snapshot and navigate to the Salesforce Deployment Pipeline where your project is located.
  2. Make sure that your developer project is in Salesforce DX format and that it is synchronized with a remote repository.
  3. Take a snapshot to ensure that your project is up to date.

Step 2: Connect Project to Salesforce Org

  1. Use the Deployment Arrow in Metazoa Snapshot to connect your project to a Salesforce org.
  2. Right-click the Deployment Arrow and select the option to create and install packages.

Step 3: Create a Package

  1. You can choose to create a new package or define a new version of an existing package.
  2. Select a Dev Hub where your package will be created.
  3. If creating a new version of an existing package, provide the package name (e.g., ‘test 8’) and select the Dev Hub (e.g., ‘my test hub’) where it will be created.
  4. Click on the next tab and select ‘Create the package’.
    • Note: Package creation may take some time. You have the option to check ‘Continue Immediately’ to start the process and continue with other tasks, or schedule the creation for a future date.

Step 4: Install the Package

  1. After the package is created, you can choose to install it in any destination Salesforce org.
  2. From Metazoa Snapshot, select the Dev Hub where your package is available.
  3. Select a destination org and the package you want to install.
  4. Click on the ‘Install Packages’ button.
    • Note: Sometimes, you might encounter an error if the package is not fully available yet. In this case, wait a few minutes before clicking the ‘Install Packages’ button again.

Step 5: Monitor the Installation

  1. Monitor the installation process. It may take a few minutes for the package to be installed in the destination org.
  2. As with package creation, if installation times are taking too long, you can schedule the installation for a future date.

Conclusion

This document provides a step-by-step guide on how to create and install unlocked packages using Metazoa Snapshot for Salesforce deployment pipelines. By creating and managing packages efficiently, you can streamline your Salesforce development and deployment processes.

Learn More!

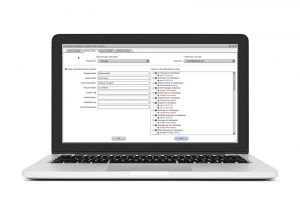
Snapshot provides powerful tools for Salesforce Administrators that help manage the change and release process, visualize org complexity, improve security and compliance, and lower the total cost of Org ownership. Visit the AppExchange to start a 14 day free trial or click the button below to schedule a demo.

🎉 Congratulations! 🎉

You’ve successfully completed the Metazoa Metadata Studio Certification Class. With the skills you’ve acquired, you’re now adept at harnessing the power of Metazoa’s Metadata Studio, seamlessly integrating artificial intelligence into Salesforce org management. You have earned you a certificate! Well done, and we wish you continued success in your future endeavors!